Anthropometric Data

Friday, April 1, 2011

Pancake with Mandarin Ginger


Merima kept telling me all week that she needed her ginger fix, so I decided to treat her to these pancakes one weekday morning. I attempted to use the King Arthur pancake recipe, but could not follow it. It is difficult for me to follow a recipe most times, when I am cooking in the comfort and freedom of my own home. I will post the recipe from the website I used and mark the adjustments/additions with an asterisk.

  • 2 large eggs
  • 1 1/4 cups milk
  • 1/3 cup sour cream*
  • 3 tablespoons melted butter or vegetable oil
  • 1 1/2 cups King Arthur Unbleached All-Purpose Flour
  • 1/8 cup wheat germ*
  • 1/8 cup flaxseed*
  • 1/4 teaspoon ginger, freshly grated*
  • 3/4 teaspoon salt
  • 2 teaspoons baking powder
  • 2 tablespoons sugar OR 2 tablespoons honey (mix with eggs)

Directions


1. Beat the eggs and milk until light and foamy, about 3 minutes at high speed of a stand or hand mixer. Stir in the butter or vegetable oil and sour cream.

2. Whisk the dry ingredients together to evenly distribute the salt, baking powder and sweetener.

3. Gently and quickly mix into the egg and milk mixture. Let the batter rest for at least 15 minutes, while the griddle is heating; it"ll thicken slightly.

4. Heat a heavy frying pan over medium heat, or set an electric griddle to 350°F. Lightly grease frying pan or griddle. The pan or griddle is ready if a drop of water will skitter across the surface, evaporating immediately.

5. Drop 1/4 cupfuls of batter onto the lightly greased griddle. Bake on one side until bubbles begin to form and break, then turn the pancakes and cook the other side till brown. Turn over only once. Serve immediately.

Then, there's the sauce:

Mandarin Ginger Sauce

1/2 cup maple syrup
3-4 mandarin oranges, zested and segmented
1 tablespoon ginger, freshly grated
1/2 teaspoon nutmeg (optional)

Combine all ingredients in a small sauce pot and simmer for 15 minutes or until warm.

Goose Island Brewery


Monday's and Tuesday's have become my weekend, especially since Gil doesn't work at Alinea on those days. This last Tuesday Merima, Gil and I decided to spend one of our 'weekend' lunches at Goose Island Brewery. Each of us tasted 12 different beers and shared three entrees:

Lamb Burger with Poached Pears and Brie with a side of German Potato Salad

Walleye Fish and Chips

The Rueben Sandwich with Sweet Potato Fries


This is a picture of Merima waiting for her food, giving me the hurry up and take the picture so I can drink my beer and get back to work look.


...And below is Gil drinking his first beer, the Green ale by Goose Island. It was nice for a light summer brew; however, the summertime ale was even better.


....then there's me, hoarding all my beer. Do I really need to share mine with everyone?! We decided in the end that everyone could taste every beer, but I knew I had to keep my eye on Gil. He's a big time beer drinker.

Merima Visits Chicago

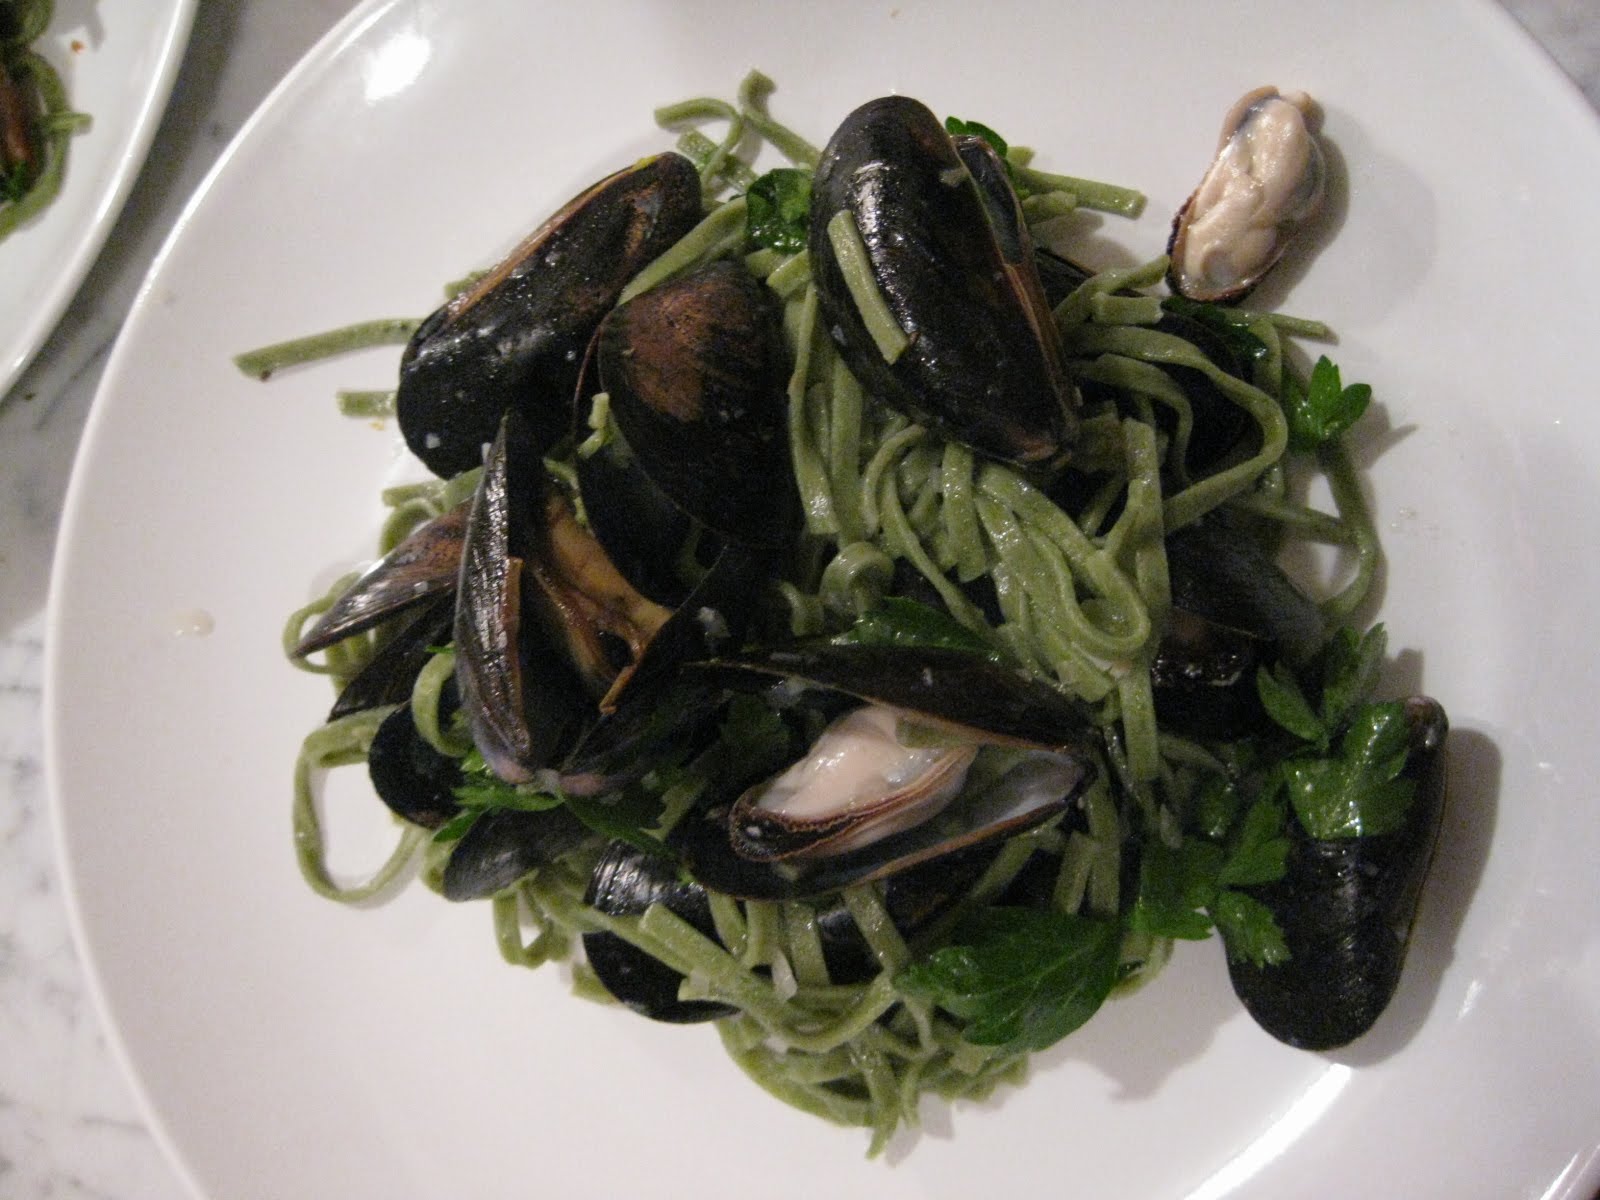
Yay, my friend Merima left cold Minnesota by bus to cold and windy Chicago to visit and keep me company while I get my feet on the ground. Currently, I do not work often, so it does get lonely. Tomorrow Merima leaves and I will once again have to entertain myself developing new recipes. Our first night of extravagant eating was mussels over spinach linguine with a Meuniere sauce and a side of garlicky green beans.

Mussels over Spinach Linguine in Meuniere Sauce

We attempted to make thumbprint cookies, but were not pleased with the results. The recipe, I thought, was full-proof and tested from the Joy of Baking. Even after the cookies came out of the oven, they were too flat and tasted like a stick of butter. However, I managed to form them back into their intend shape and refrigerated them. A day later we tasted again, not wanting to trash our lovely cookies of apricot and almond delights. To our surprise, they tasted much better. Still buttery, but decent.

The picture on the left depicts me pulsing the roasted almonds in the food processor. Almonds were used to coat the cookies just before baking.

My apartment is quite small as you can see with only enough room for one body to manage the stove, sink and preparation area. I am actually standing in front of the island prep station with my oven and sink hiding behind.

Do you see all my canned/preserved goodies in the top of the picture? That is from my stock of 80 something jars. Neat eh?

This is the thumbprint batter. Nice and buttery. It definitely needed to be refrigerated; I believe it was for 45 minutes, not the suggested 30 minutes. It was far too soft to work at 30 minutes.


Day 2 of the Sourdough Adventure

When I first started this recipe, I felt it wasn't going to work since the description in the procedure said the dough should be stiff. Mine was not; however, once I looked at it this morning to add the bread flour and water, it seemed to be doing just as it should. After more thought, I wondered why the recipe was in ounces, rather than in grams. I mean, this is a French recipe from The Pouliane, right? Well, it probably is not, and it did need some tweaking. Initially, in the first day, I added an extra 2 ounces of flour so that the flour was evenly hydrated and not overhydrated. Today, on the contrary, I did not adjust any of the weights.

*Remember, when baking, it is best to measure by weight, rather than by amount and it is also best to weigh in grams than ounces. Grams are more accurate.


Wednesday, March 30, 2011

Bread? Bread! The Great Adventures of Sourdough

Tomorrow marks the official first day of my wild yeast sour dough starter! Boy am I pumped. I went to Whole Foods and bought the necessary ingredients, which just happened to be on sale in the bulk department. Speaking of which, buying in bulk must be a foreign concept to Chicagoland people. I have visited and shopped at several different stores, but have only found but one worth visiting. This particular Whole Foods store is located in Lincoln Park, foodie central. I went crazy and stocked up on dry goods since it is a bit of hike from where I live [...if traveling by bike with several bags of groceries that is].

Anyway, I now have all my ingredients to start my sourdough bread journey. It begins with organic rye flour and water for one day. Then, for the next four days, I feed my seed culture, more flour, only this time all purpose organic flour and more water. After this, I am then ready to prepare the barm, the 'mother' or starter for most basic sourdough recipes. The recipe I fancy to prepare first is a miche style bread from France. None other than Lionel Poilane, a famous French baker, is known for this style of sourdough. His recipe is in the book The Bread Baker's Apprentice, and I highly recommend purchasing this book if you are a serious bread baker yourself. If you want to read a bit more about Mr. Poilane, go to the following website:

http://www.businessweek.com/globalbiz/content/feb2007/gb20070206_625846.htm

Ingredients

1cup (4¼ ounces) dark rye or coarse whole rye (pumpernickel-grind) flour
3cups (13½ ounces) unbleached high-gluten or bread flour
2¼cups (18 ounces) water, at room temperature

Steps

  1. Day 1: Mix the rye flour and ¾ cup (6 ounces) water together in a bowl until they form a stiff ball of dough. Do not worry if the dough is very stiff, but be sure that all the flour is hydrated. Press this piece of dough into a 4-cup measuring beaker and place a piece of tape on the beaker to mark the top of the dough. Cover the beaker with plastic wrap and leave it at room temperature for 24 hours.
  2. Day 2: The dough should not have risen much, if at all, during this time. In a mixing bowl, combine the sponge from Day 1 with 1 cup (4½ ounces) unbleached flour and ½ cup (4 ounces) water, mixing with your hand or a spoon until all the ingredients are evenly distributed. The dough will be somewhat softer and wetter than before. Return this to the beaker, press it down, and replace the old tape with a new piece of tape to mark the spot. Cover with plastic wrap and ferment for 24 hours at room temperature. Do not be put off by the strong, unpleasant aroma of the dough; this will eventually brighten.
  3. Day 3: Check to see if there has been a rise in the dough. There will probably be some fermentation but not a lot, perhaps a 50-percent rise. Regardless, discard half of the starter (or give it to a friend to cultivate) and mix the remaining half with 1 cup (4½ ounces) unbleached flour and ½ cup (4 ounces) water, just like on Day 2. It will be a little wetter. Again, return it to the beaker. It should press down to the same height as on Day 2. Re-tape the beaker to mark the top of the dough, cover, and ferment for 24 hours.
  4. Day 4: The sponge should have at least doubled in size; more is even better. If it is still sluggish and hasn’t doubled in size, allow it to sit out for another 12 to 24 hours. Otherwise, repeat as on Day 3, discarding half of the starter and mixing the remaining half with 1 cup (4½ ounces) unbleached flour and ½ cup (4 ounces) water, returning it all to the beaker as before. Cover and ferment until it at least doubles in size; this may take 4 to 24 hours. It is OK if it triples in size, but because it is now fairly soft and spongelike, it will not be able to sustain that large of a rise without falling. If it falls easily when you tap the beaker, that is the sign that your seed culture is ready to be turned into a barm, or mother starter.

Thursday, March 24, 2011

Momofuku Pork Buns


Well, I purchased the Momofuku book about a couple of months ago, but have been eyeing it up since my friend Bobby showed me his copy. One of the first things which struck me were the steamed pork buns. The actual amount of rendered pork fat is not colossal by any means, but rather scant overall. While making these I knew they were going to be worth the wait, for it took several hours until I could indulge in the soft, delicate buns.

During the fermentation and rest times, I prepared accoutrements playing off Momofuku's standard cucumber pickles, hoisin, pork, and green onion fixings. Instead, I prepared an edamame puree [see below], hoisin, sriracha, leek and pickled carrot.

Edamame Puree:
3/4 cup edamame, frozen is quite alright
pinch salt
pinch sugar
2 tsp soy sauce
1 tsp. wasabi powder
1/8 cup yellow onion
2 tsp. brown rice vinegar
1 1/2 cup water
1 tsp. oil

Saute onion in oil. Once translucent, add remaining ingredients and cook for about 30-40 minutes on medium heat covered with a lid until edamame is quite soft and skins of beans separate. Puree in food processor or blender. You may need to adjust the water content based on how much evaporated in the cooking process.

As for the Momofuku steamed bun recipe...well, I guess you'll have to buy the book. It's well worth the price.

Overall, the recipe was easy; it was just time consuming for the average person. However, I highly recommend trying this one at home. The flavor will send your senses into a frenzy and you'll be sorry you didn't make more.

Thursday, March 17, 2011

Kimchi

According to my Joy of Pickling, "Korean scientists have found that fresh cabbage kimchi is actually more nutritious than unfermented Chinese cabbage....Its levels of vitamins B1, B2, B12 and niacin are twice what they were initially, and its vitamin c level equals that of fresh cabbage."
....And guess what? It tastes amazing! Unfortunately, for this particular recipe, I could not find Korean chili powder, so I substituted chili powder and chili flakes. My lovely friend Kelsey just happens to live in South Korea. I spoke with her while waiting for my cabbage to soak in the salt brine and told her about the kimchi. She was delighted and said I needed to make some for her arrival. Sure I would, just as long as she sends some of that spicy magic powder directly from Korea.

The recipe I used was from the Joy of Pickling, but I did tweak it a bit with more garlic and spice. Before I play around with too many variations, I thought it best to begin with the basics. Once I perfect the base recipe, then I will go on to add things like carrots or daikon radish.

Cabbage Kimchi

3 tablespoons plus 1 teaspoon pickling slat
6 cups water
2 pounds Chinese cabbage, cut into 2-inch squares
1 1/2 tablespoons minced fresh ginger
2 tablespoons Korean ground dried hot pepper (or other mildly hot ground red pepper)
1 teaspoon sugar

1. Dissolve the 3 tablespoons salt in the water. Put the cabbage into a large bowl, a crock or a nonreactive pot and pour the brine over it. Weight the cabbage down with a plate. Let the cabbage stand for 12 hours.

2. Drain the cabbage, reserving the brine. Mix the cabbage with the remaining ingredients, including the 1 teaspoon salt. Pack the mixture into a 2-quart jar. Pour enough of the reserved brine over the cabbage to cover it. Push a freezer bag into the mouth of the jar, and pour the remaining brine into the bag. Seal the bag. Let the kimchi ferment in a cool place, at a temperature no higher than 68 degrees F, for 3-6 days, until the kimchi is as sour as you like.

3. Remove the brine bag and cap the jar tightly. Store the kimchi in the refrigerator, where it will keep for months.

Makes about 1 1/2 quarts.